You’re late for a meeting. The traffic is heavy. Then you see it. The temperature gauge isn’t just climbing; it’s digging a hole into the red zone. Panic? Good. That means you’re paying attention. But panic won’t stop the engine from warping. What stops it is knowing exactly what a radiator leak looks like and how to fix it before your head gasket blows.
This isn’t about calling a tow truck immediately. It’s about saving your wallet and your sanity. You need to spot the signs, find the drip, and plug the hole. Here is how you do it without losing your mind.
Short Summary
- Spot the symptoms: Watch for erratic temperature gauges, sudden coolant drops, and colored puddles under the car.
- Find the source: Use your eyes for a visual check or a pressure tester to trap the elusive drip.
- Stop it from happening again: Regular flushes and cap checks keep the system sealed.
Recognizing the Signs of a Radiator Leak
Ignoring a leak is a fast track to a seized engine. Coolant loss means your block gets hot, fast. Once you catch it early, you avoid the “tow truck and bill” scenario. So, what triggers the alarm?
It usually starts with the gauge. Then the reservoir. Then the ground beneath your tires.
Temperature Gauge Fluctuations
Your dashboard thermometer is your first line of defense. If it’s bouncing around or climbing when you’re cruising at a steady 60 mph, something is wrong. It’s not just a “radiator leak” causing this. It could be a stuck thermostat. A clogged core. A water pump that’s on its last legs.
But ignore the other possibilities for a second. Assume it’s a leak until proven otherwise. Why? Because if you keep driving, you cook the engine.
Here is the drill:
- Check the coolant level immediately.
- Look at the hoses. Are they cracked? Brittle?
- If you can’t find the issue under the hood, get a pro. Do not guess.
Coolant Level Drops
Open the hood. Find the reservoir. It’s usually a translucent plastic tank near the front. Is it below the “Min” line? If so, you are losing fluid.
Coolant systems are closed loops. They don’t evaporate like washer fluid. If the level drops, it’s escaping somewhere. It’s not magic. It’s a leak.
Inspect the radiator. Look at the connections. Check the lower hose. Use gloves. Use goggles. Hot coolant sprays. It burns. Do not skip the safety gear. Let the engine cool down first. Seriously. Don’t be a hero.
Puddles Under Your Vehicle
Walk around the car. Look at the pavement. What’s sitting there?
If it’s bright green, orange, or pink, that’s coolant. If it’s clear and smells like gas? That’s a different problem. If it’s black and oily? You’re leaking motor oil.
You need to identify the fluid correctly. A radiator leak usually leaves a sweet-smelling puddle. If you see one, trace it back. Start at the highest point of the drip and work your way up. It’s rarely a direct vertical line.
Locating the Source of a Radiator Leak
Okay, you know you have a leak. Now you need to find it. Pinpointing the source matters. A pinhole in the tank needs a different fix than a cracked hose.
Two methods. One uses your eyes. The other uses tools.
Visual Inspection
Start with the basics. Look at the radiator itself. Is there crusty residue (dried coolant) on the fins? Look at the cap. Is the seal cracked? Look at the hoses. Are there bulges?
Corrosion eats aluminum and brass alike. If you see white or green powder around a joint, that’s your leak.
Be careful. Sometimes the leak only happens when the system is pressurized and hot. You might see nothing on a cold engine. If visual inspection fails, move to the next step.
Using a Coolant System Pressure Tester
This is the pro move. You buy a hand pump for $15 at any auto parts store. It screws onto your radiator neck or reservoir cap.
Here is how it works:
- Seal it up. Attach the tester.
- Pump it. Push air into the system. Do not exceed 10-15 psi. Go higher and you might rupture a weak hose or blow a seal you didn’t know was weak.
- Watch it. If the pressure holds, your system is sealed. If the needle drops, you have a leak.
- Find the drip. The pressurized air will force coolant out of the small pinhole. It might mist. It might spray. You will see it.
This method saves you hours of guessing. It tells you exactly where to look. Fix it while you have the pressure tester attached. It’s easier to work on a pressurized system because you can see the escape point clearly.
“A pressure tester doesn’t lie. It finds leaks your eyes miss.”
Now you know how to spot it. You know where to look. In the next part, we’ll talk about the actual fix. Because knowing the leak is only half the battle. Plugging it is the other half.
Pinhole Corrosion and the Cost of Neglect
Pinhole leaks are the bane of aluminum and copper-core radiators. They start as microscopic breaches in the metal, usually triggered by internal corrosion. You won’t see them at first. The coolant just slowly evaporates or drips onto the pavement in silence until the temperature gauge climbs.
Corrosion eats away at the interior walls. Once a hole forms, pressure drops. Efficiency plummets. Your engine runs hotter. If you ignore it, you risk a blown head gasket or a warped block. That is expensive.
How do you catch it early? Inspect the radiator fins and tanks for rust stains or white crusty residue. If you spot a pinhole, you have two options. A commercial leak sealant might plug the tiny hole temporarily. Radiator epoxy works similarly but adheres differently. Neither is permanent. If the corrosion is widespread, patching it is a bandage on a bullet wound. You need a replacement.
The Hidden Failure Point: Radiator Caps
People ignore the cap. It’s the least glamorous part of the cooling system. Yet a bad cap causes more leaks than you’d think.
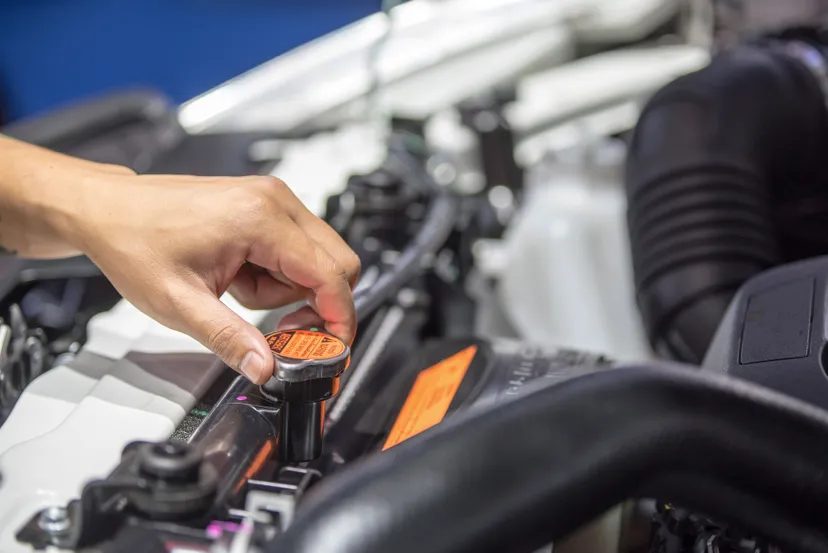
The radiator cap isn’t just a lid. It’s a pressure relief valve. It holds system pressure to raise the boiling point of your coolant. If the seal on the cap is cracked, worn, or corroded, pressure escapes. Coolant sprays out. Efficiency drops. Overheating follows.
Check for dents. Look for corrosion on the sealing surface. If the rubber gasket is brittle, replace it. Do not guess. Install a new cap with the correct pressure rating for your specific vehicle. A generic cap might fit, but it won’t hold the pressure. Running low pressure means your coolant boils over at lower temperatures.
Start the engine after installation. Watch the area around the cap. Any mist or spray means the seal is failed. Replace again. Do not drive with a leaking cap. The damage to the engine is real and immediate.
Seals, Hoses, and Connection Points
Leaks often hide in the joints. Union nuts connect water lines to the radiator valve. They loosen over time. Vibration shakes them loose. Age dries out the O-rings. When a seal fails, coolant escapes under pressure.
Inspect every connection. Hoses degrade. Clamps loosen. Look for wet spots, crusty deposits, or swollen hose ends. If a hose feels spongy, replace it. If the clamp is corroded, swap it out.
Faulty seals are not always catastrophic immediately. A slow drip can seem manageable until it isn’t. But ignoring worn connections invites disaster. Tighten loose union nuts. Replace cracked gaskets. Ensure every fitting is secure. The cooling system relies on integrity at every joint. One weak link breaks the cycle.
Sealing the Breach: Sealants vs. Epoxy
Once you’ve confirmed the leak source, you need a fix. Not all fixes are equal.
Commercial leak sealants are the quick-and-dirty option. You pour them into the coolant reservoir. They circulate. They find the leak. They seal it. It’s easy. It’s cheap. It works for tiny pinholes.
But there’s a catch. Sealants are temporary. They can clog heater cores. They might plug narrow passages in your radiator. Use them only if you need to drive home. Monitor the temperature gauge closely. If the leak persists, the sealant failed. Seek professional help.
When Epoxy Makes Sense
Radiator epoxy is different. It’s a two-part adhesive. You mix it. You apply it directly to the leak. It cures into a hard, permanent bond.
This method works best for external cracks or holes in the radiator tank. It is more durable than liquid sealants. But it requires prep.
Clean the area with a wire brush. Remove all rust and debris. Mix the epoxy exactly as instructed. Apply it generously. Let it dry completely. Do not rush this step.
Wear gloves. Wear safety glasses. Epoxy sticks to everything. Follow the package instructions. If the leak is internal or in a high-stress area, epoxy might not hold. It is less effective than professional repair for structural failures.
When to Call a Pro
Some leaks are beyond DIY repair. If the radiator is cracked in a high-pressure zone, if there is internal blockage, or if corrosion has weakened the tank significantly, call a mechanic.
Professional repairs offer reliability. A certified technician can pressure-test the system. They can identify hidden leaks. They can replace faulty components. They can ensure the cooling system operates at peak efficiency.
Prevention is cheaper than repair. A professional inspection can catch wear and tear before it becomes a breakdown. Check the cap. Inspect hoses. Replace worn seals. Keep the system clean.
Ignoring a radiator leak is a gamble. You might get lucky. You might end up with a blown engine. The choice is clear. Fix it right. Or don’t fix it at all.
Why regular maintenance matters more than you think
Fixing a leak is a pain. Preventing one is better. A leaking radiator doesn’t just mean a puddle in your driveway. It means potential engine damage. Ignoring it turns a small fix into a massive bill. You don’t want that headache.
Regular maintenance is the only real defense. Check levels. Flush the system. Stop problems before they start.
Checking and flushing coolant properly
Your cooling system needs the right fluid volume. If it runs low, it boils. Overheating follows quickly.
Check levels regularly. But don’t just glance at the tank.
Here is the rule: Engine must be cold. Opening a hot system is dangerous. Coolant sprays out. You get burned.
Look at the reservoir. The fluid should sit between the min and max lines. If it’s low, top it off. If it’s dirty, flush it.
Contaminants build up over time. Rust. Sludge. These block passages. They cause pressure spikes. They lead to leaks.
To flush it yourself:
-
Drain the old coolant completely.
-
Fill with fresh fluid.
-
Start the engine. Let it run for a few minutes. This circulates the new mix.
-
Shut it down. Check the level again. Top off if needed.
Inspecting the radiator cap
People forget about the cap. It’s a small part. It’s critical.
The cap maintains system pressure. If the seal fails, pressure drops. Coolant boils at a lower temperature. The engine overheats. The radiator gets stressed. Eventually, it cracks.
Inspect your cap regularly. Look for cracks. Check for corrosion. Look at the rubber seal. If it’s brittle or torn, replace it.
Don’t guess. Replace it. It’s cheap insurance.
When you install a new cap:
-
Run the engine.
-
Watch for leaks around the neck.
-
Ensure the seal is tight.
A poor seal means lost coolant. Lost coolant means a dead engine. Don’t risk it.
Keeping the cooling system clean
Corrosion kills radiators. Buildup chokes them. A clean system lasts longer.
Regular cleaning prevents internal corrosion. It stops sludge from forming. This keeps flow efficient.
Use a dilute cleaner. Simple Green Pro HD mixed with water works well. It’s safe for aluminum and plastic.
Never use brake cleaner. Brake cleaner is for metal surfaces only. It will destroy seals and hoses in the cooling system. Do not use it.
Consider professional descaling. This removes hard buildup. It extends radiator life.
A clean system prevents future leaks. It keeps temperatures stable. It saves you money.
The bottom line
Recognizing leaks early helps. Finding the source matters. Understanding causes prevents recurrence.
But prevention is the best strategy. Regular checks. Flushes. Cap inspections. Cleaning.
Stay vigilant. Take care of the cooling system. You avoid costly repairs. You avoid engine damage. You keep driving.
That’s the goal.